Saturday, April 6, 2013

The Purge (or The Big Dump)


I sat silently with a cup of coffee in  my hand.  Just staring at the situation I had to deal with.  The morning was sunny and cold but I felt comfortable in my layers of old sweaters.  Frost clung fiercely to the plastic tarp as the building warmth of the sun ushered it away.  I lifted the cup to my mouth directing my attention for just a moment to the steam floating from the coffee and warming my face.  A short moment of serenity as the robins sang out their anthem to the spring and to this day.  For today is the day I am to tackle the mountainous mess that I have affectionately referred to as the "garage tent".

On it's last legs!


For close to a year and a half I have stuffed this tent with items that I have salvaged.  Items I believed I could use in my projects.  I have attempted to neatly organize and store it.  But blowing storms, hasty placement of objects and a family of long tailed critters living within the layers have forced me to this task.  To empty the tent.  To purge! To make the big dump!
What to do with all this stuff?


I finally have the garage pretty weather tight that I can use it as, basically... a garage.  The south side that was open to the blowing elements has been sealed up with a layer of siding paper.  I have in the door and the window on that side as well.  The only holes left on the garage face away from the direction of any incoming weather.


The tarps on the roof are in good shape so I am confident that anything I put in here will stay dry until I put on a permanent roof.  But I need a wood storage rack in the garage and I don't necessarily want to build another one when I have a perfectly good one.  In the tent... buried under a boat load of wood.  


So what do you do in a situation like this?  You stare at it for a while as you sip your cup of coffee and psyche yourself up for the task.  Because I know this is no quick task.  I know that the moment I start this will be at least an eight to ten hour task.  But it must be done! Because like any kind of purge, any kind of cleansing, the psychological relief can be up lifting. Comparing to that of a laxative induced release after days of clogged suffering.  With that inspiration in mind, I put down my coffee cup, put on my work gloves and walk straight into the cascade of clutter.  Perhaps never to be seen again.

Now that the garage is down on the it's foundation and the framing has begun, I have a clearer idea as to what I really need.  For months it was a grab bag mentality when it came to the opportunities for salvaged material.  Although I had a vision and tried to curtail my salvaging to meet it, there were still many unknowns that pushed me to take things for the "what if".  Many of those items I now see are simply adding to the overwhelming collection in the tent.  I pulled material out and spread it all over my backyard. More or less covering every square inch and even surprising myself how efficiently and densely packed the tent was.  This alone took me nearly thee hours.   I then had to step back for a moment and grab another cup of coffee to survey the scene.  The material was laid out like injured soldiers in a triage field awaiting surgery.  It was now my job to walked through the wounded and decide who would make it and who would not.

I knew I wanted to keep the cedar boards.  I had many uses for those.  I got the rack set up in the  garage and dedicated a portion of it to the cedar.
New Rack in the garage.  Looks about the same.

I then picked through the framing material and evaluated what was useful and what was not.  As you can see from my last entry, my standards aren't to high.  However, I did have many pieces I had to convince myself were really of no use.  I do have a very difficult time taking things to the dump, but eventually it does have to happen.

Luckily in Seattle I do have some choices as to what to do with my unwanted items.  I am thorough in my separation of the material heading out.  Almost to an obsessive point.   I stack all the metal objects in one pile, even a couple of old caulking guns.  Even though there is a metal recycling pile at the dump, I like to give my metal to the scrap metal guys that hang out at the entrance of the dump.  The wood I separated into a the "useful" and "not".  The useful stuff went to Second Use Salvage.  The "not" was separated to "clean" (with no paint or stain) and "dirty".  The clean can be thrown into the yard waste.  Dirty... well it's dirty and has to become landfill.  I was happy that in the 4 truck loads that I hauled away only one became landfill.


The happy ending... NO MORE TENT.  I'm sure there was celebrating within the walls of my neighbors house.  The eye sore testimony to my white trashdom was finally gone.  No more rattling and rustling coming from my backyard during the winter storms.  The unfortunately thing is that there was no saving it.  Besides the year and a half this stood on my yard, it spent two years on a construction site.  It did well in it's job to serve and protect.  But the tarp bore many duct taped wounds and no longer shed water.   The poles were severely bent.  The metal salvage guys were blessed this day.  Sadly the landfill is a little more full.  But my yard is open, the garage is packed and I can once again see the mountains from my backyard.
Look at that view!  OK.  The old tree needs to come down.  But I do have a hard time letting go of those things.

Sunday, March 10, 2013

Framing Like A Cheap Bastard - 101


I have finally started to re-frame parts of the old garage. (I feel like I need to give her a name.  If you have a suggestion, leave a comment with the name).  Before I get in to telling you what I have accomplished, let me tell you the challenges a cheap bastard like myself has when it comes to framing.  When using salvaged material, you need to be ready to add a few extra steps to the process.  You can't just grab a fresh 2x4 off your pile of framing material, cut it to size and nail it into the wall.  Chances are the salvaged board has nails in it that need to be pulled.  Some times a few nails, some times a lot of nails.  Take these board for instance.

Good boards... lots of nails.  It is time to take a look at my up coming hand book "How To Build Like A Cheap Bastard"  This is taken from chapter on framing.  The section is called "How to de-nail a board- 101".
________________________________________________________________________________

... You must know your tools and which one is the right tool for the job.  Having an assortment of pry bars will come in handy to face the number of types of nails you will encounter.


Of course hammer and nail pullers.


Always remember your eye protection.  No fun trying to do this with a piece of nail stuck in your eye.


It is almost certain that you will salvage a number of boards that have been nailed together.  I find that these are some of the best boards to salvage and re-use.  Being joined together they generally have not twisted or warped over time.  Here are some simple steps to pull these apart without a huge amount of cussing.

Step One:  First you need to bend back any nails that have been bent over the board.  Do this by first slipping the claw end of the hammer under the nail and pulling back.  Then gently tap it back with the head of the hammer.
 
Step Two: Using a stout pry bar, tap it in-between the two boards and give it a twist.  Repeat this all the way down the board on both sides.


At some point in this process you may have to move up to a slightly larger crow bar for a little more "UMPH" and repeat this step


Step three:  Slide a larger pry bar between the two boards.  At this time you may have to place the board on the ground and keep a foot on the lower board as you pull up on the upper board.  The boards should pull apart with a little persuasion.

What you should have at this time are two boards with a bunch of nails sticking out of them.  You can choose at this time to keep one of the boards like it is and turn it into a home security weapon, or move on to step three.

OUCH!!


ALWAYS REMEMBER NOT TO LAY A BOARD FULL OF NAILS ON THE GROUND WITH THE NAILS STICKING UP!  Nothing stops progress than a trying to pull a nail out of you shoe and foot!


Step Four: Tap the nails backwards until they are no longer poking out that side of the board.  (see below for helpful hints on what to do if you bend a nail)**


Step Five: Flip the board over and use your pry-bar to pull the nails out.  If the nails are pretty long, it helps to put a block of wood under the pry-bar for extra leverage.


If the head breaks off the nail, use a nail pullers.


Step Six:  Dispose of the nails properly.  I like to keep them in bucket because I love to see just how many nails I have pulled.  Look around the area you have been working and make sure no stray nails are laying about.  Especially if you have been working on your lawn and barefoot kids are near.  I like to fill the bucket and take it down to the metal recycling center.  I got 3 bucks for my last bucket of nails!


You now have two perfectly good boards for framing!!

As you can see, I have salvaged quite a few!


Here is what framing I have accomplished thus far.


I re-framed the south wall.  This is where the old window was.  I framed the rough opening for the door and a small window I salvaged.  Using 1/2" ply that came off my neighbor's house I managed to sheet this entire side of the garage.


Next was the garage door opening.  The entire west side is also getting re-framed and most of it was rotting away.  I re-enforced the header and re-framed the opening.  I put in a new beam over the header that was left for me by the guys who built the house next door.


A beam that come out of my neighbor's house is now in place in the center of the structure and I was then able to partially frame the loft.  I now have a safe place for the windows and skylights  I have salvaged.

The more I strengthen her bones the stronger my confidence in this structure.  

My next goal is to button up the outside and make her weather tight.  But in order to do that, I need to deal with moving this....
OH MAN!! THE TENT!


***HELPFUL HINTS IF YOU BEND A NAIL!

1) STOP POUNDING!
2) DON'T PANIC!!

3) Get your nail pullers!
4) Place the nail pullers slightly above the bend in the nail 

5) Bend the nail in the opposite direction of the bend straightening the nail.  In bending the nail back it may bend where it comes out of the wood.  Don't freak out.  Just lower the nail puller to that spot and give it a little tug back.


6) O.K. Go back to pounding the nail out, but start softly and bring your hammer down straight for crying out loud!!


GOOD JOB.  Now you deserve that martini!


Sunday, February 10, 2013

STANDING TALL


Like a boy on Christmas morning, I jumped out of bed early and was ready for the day!  6am!  Aw, man!!  None of friends were to be over until after 10!  I can't wait!  I can't wait!  Because today is the day!  The day I have been waiting close to a year and a half for.  The day I lower my old beauty onto her new foundation, straighten her old bones and have her standing tall once again!

Waiting to be taken off the box!

I try to slow myself down.  I make a hearty breakfast, drink 4 cups of coffee and pace around the yard going over the plan about 10 more times in my head as to how I'm gonna make this work.  You see, not only do did I need to lift the structure up off its shoring box, but the walls need to be given a good push and pull in order to straighten out and the entire structure needs a strong nudge to shift it about 4 inches counter clock wise so it sits squarely on its foundation.  Over the years this old girl kept settling, shifting and twisting herself to the northwest.  When I cut her off her old foundation there was such an amazing series of chiropractic "pops" as each stud and rafter released years of stress.  I swear I heard her give a big sigh of relief.  She has had a year and a half of traction to give those old bones a rest.  Today she starts rehabilitation to stand up straight on her own feet again.

My help arrives!  My friends Anthony and of course Keith.  I can always count on Keith!  My friend Paul provided later back up. I gather them in the backyard and in great excitement I laid out my plan.  It involves a couple of jacks and some 4x4 posts and carefully coordinated lifting and pushing and lowering.  After I enthusiastically explained this rather easy process I turned to see the concerned looks in my friends faces.
Anthony (in red) and Keith seem a bit uneasy of my plan.
Larger jack in position

"Really!  It's a piece of cake!"  I assured.  However, they were not as easily convinced as I was.  I was ready to dive into it!  I had waited all morning!  But, I had to let them wrap their heads around it and talk it through.  I guess I had to respect that.  Give them some time to figure it out with me.  We're all in our 40's now and we don't need to put ourselves in any situation that may result in our needing a chiropractor ourselves.  But the coffee was flowing through my veins topped with inpatient excitement.  OK! OK! lets get moving.

Oh, but it's never as easy as you imagine it.  So many little things get in the way.  Especially when the space is filled with a bunch of crap to start with.  So we knew what the first task was.  Empty this baby out. (you think I could have done that while I paced around waiting for everyone to show up.)  I thought many times of getting a temporary storage space for this stuff.  But that would only encourage me to collect more stuff which would not be good for my sanity or my marriage.  (I can't wait to get rid of that tent!)
Anthony preps the sill plates

After that, we finally figured out our assignments and a plan of action.  Anthony was to cut additional sill plates and drilled holes to cover the bolts.

Need a little more bracing

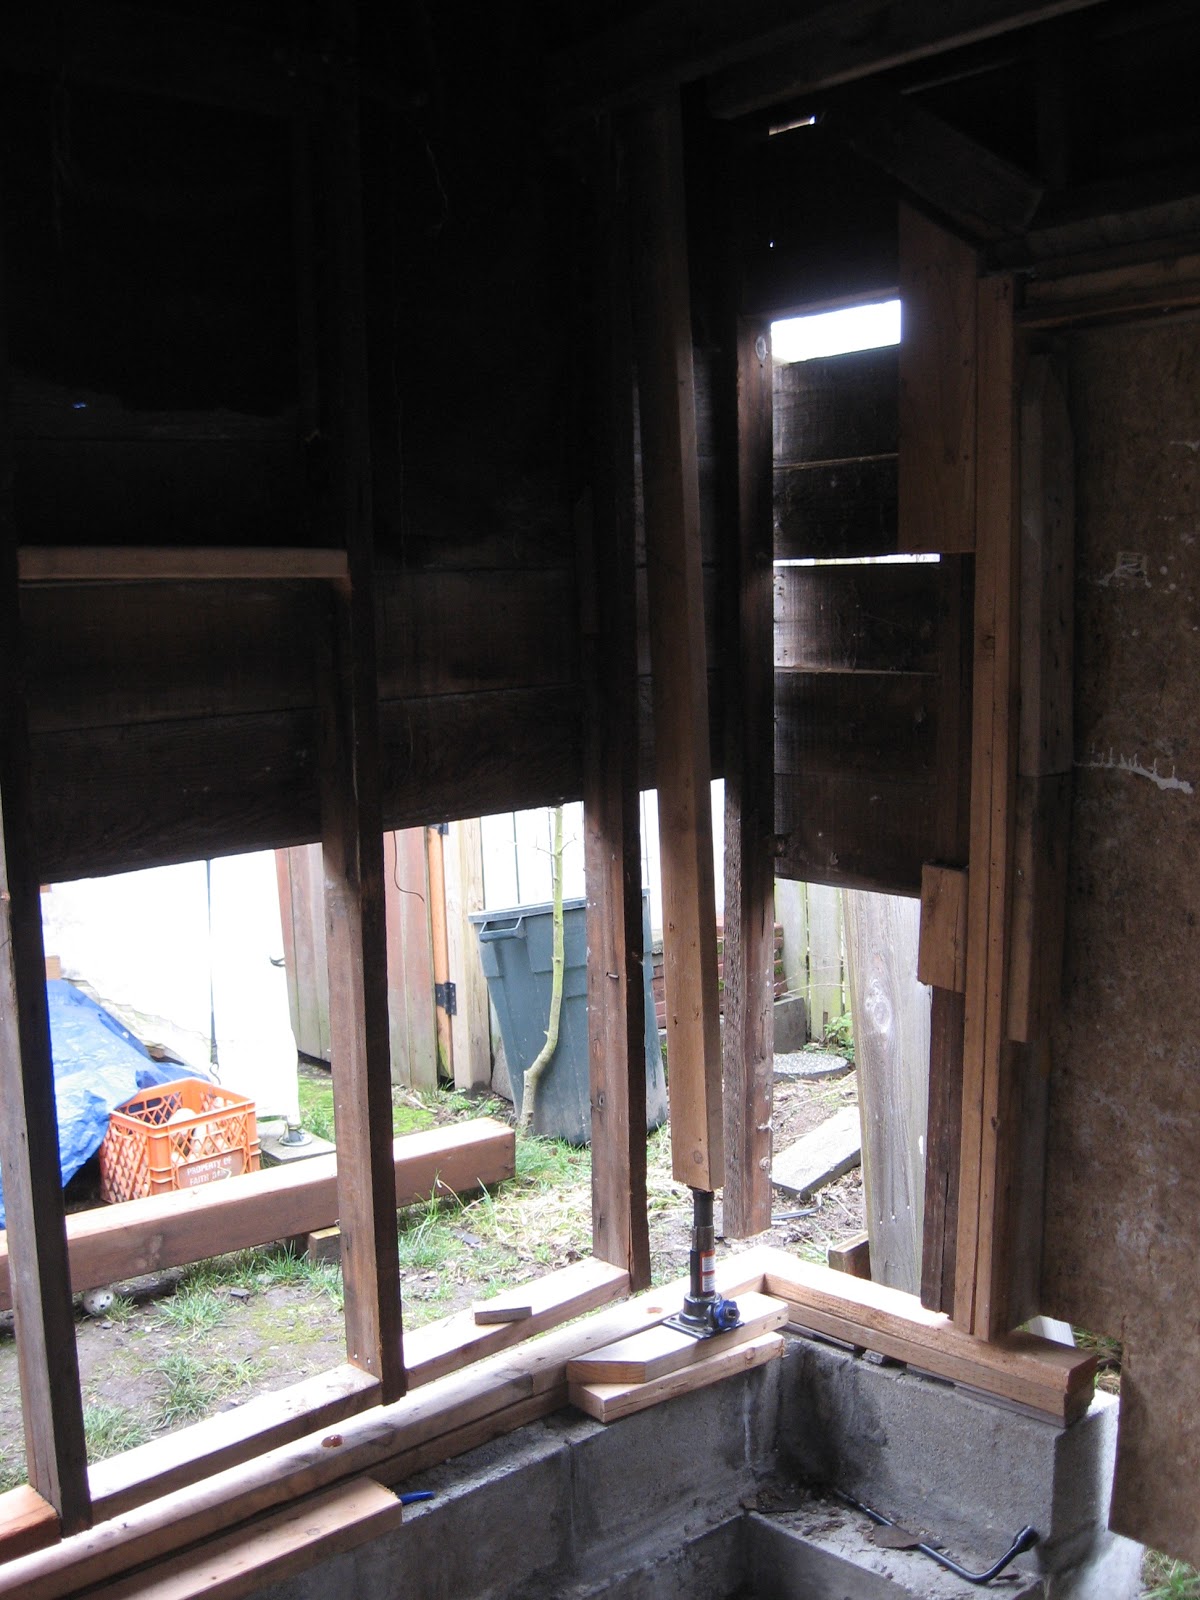
 Keith positioned the jacks at the best lifting points and fit the sill plates into position. I tightened the hold down bolts and did any of the last pick up framing needed to stabilize her walls.  We had four jacks all ready to go.
Second jack in position.


 We then slowly lifted her off the box, just a few inches.    This was probably the most nerve racking part of the process.  Like an industrial balancing act, there she free floated for a while as we positioned all the sill plates. The sill plated gave us a little trouble as each wall more or less had their own height they needed to be lifted to.  Anywhere from 1-1/2" to 5".
Had to use the jack from my truck.


 It took us a number of tries, lifting and lowering to adjust each stud with small cuts or adding some more plates and shimming  to get  everything somewhat level.  Sill plates in place, it was time to bring her down to stable ground.  She gave us little resistance as we pushed and pulled her into place.  She gently touched down and the infamous words rang through my head, "Houston, the Eagle has landed!"

Paul adds a helping hand.


Safely on it's foundation!


This baby isn't going anywhere!


I wish I could say there was a joyous celebration.  However, the days activities had exhausted us.  There was some back slapping and a moment of pride filled gazing upon our accomplishment.  Anthony had a sick child to attend to, Keith was nursing a sprained ankle and I had neglected my family all day.  It was time to clean up and call it another day.  I could go to bed that night finally with the confidence that the garage was finally secured to it's foundation, embedded in the rock, planted firmly on the ground and now standing tall.

Taken a year ago, you can see how the middle of the roof sags and slumps in the lower left.
Now she stands straight.  No more sag!